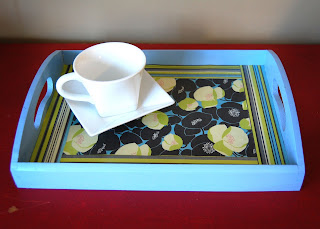
My monthly Craft Night got cancelled last week after I had already bought my supplies. I really wanted to make an embellished tray, so you guys get a tutorial and we can have our own virtual Craft Night! I am by no means a Mod Podge expert (unlike Amy or Emily), but I do love the stuff.
First up, you'll need some supplies. I bought everything at Michael's.
- A plain wooden tray (this was about $4 in the unfinished wood section)
- A can of spray paint (more on this later)
- Mod Podge
- Paintbrush
- Fancy paper (the paper I used was heavier weight, like cardstock - did you guys know there's Amy Butler paper?! You scrapbookers have the coolest stuff!)
- Scissors
- Spray sealer (optional)
1. Spray paint your wooden tray so it's nice and even. I knew I was going to cover the inside bottom part with paper, so I didn't worry about spraying that too well. I used Krylon spray paint for this and it took three coats for it to look good. In my opinion, the Krylon paint doesn't hold a candle to the Valspar spray paint, which I used for my craft fair signs. The Valspar paint covers so much better and is glossier. Moral of the story - get the Valspar if you can. My Michael's didn't have it, but I bought Valspar spray paint at Home Depot last time.
2. Let the tray dry, then pick your paper - I picked two prints from this pack
3. Paint a layer of Mod Podge on the tray bottom - don't be stingy, but don't glob it on or it just makes a mess. Lay your cut piece of paper in the middle of the tray bottom and smooth out any bubbles.
4. Next up - the border. The stripes made it super easy for me to cut even strips of paper to make the border - they're all 1 1/4" wide and I just cut along a stripe. You may want to use a paper cutter like this one to make nice even cuts, or use a ruler and draw your straight lines before cutting. Cut 4 strips, all the same width. Add another layer of Mod Podge on each long edge of the tray bottom and press on two of the border strips as shown. Smooth them out like you did with the main paper.
5. Use the same method you used with the main paper to cut the short-side border strips to the right size - just lay them in the tray where they go and crease where they need cut. Trim them down, paint some Mod Podge on the short sides where the border goes, and glue 'em on.
6. Paint on a nice, even layer of Mod Podge over the entire tray bottom. You can see in this picture how sometimes the paper gets a little bumpy and uneven - don't worry, it usually smooths out as it dries. Let it dry and add another coat for good measure.
7. All done! Now aren't you proud of yourself?
I decided to spray mine with a clear sealer because with two kids in the house, durability is pretty high on my priority list. I also am not great at painting Mod Podge evenly, so it covers up my brush strokes a little bit.


Omg, you are so awesome! I might try this one, even though I'm craft-stoopid. :) I will have to coordinate my next Indy visit to overlap with actual Craft Night.
ReplyDelete